Verified at 2026-04-12 10:04 UTC
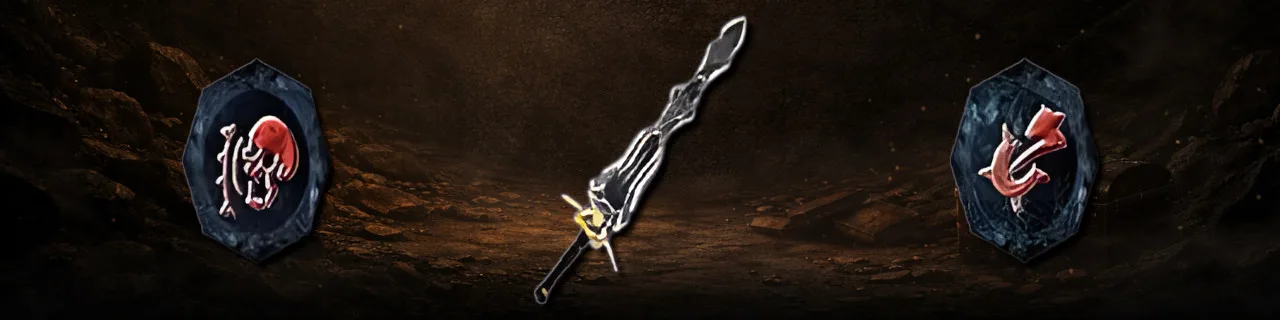
What Is the Claw of Beliar?
The Claw of Beliar is an ancient relic and one of the strongest melee weapons in the game. You get it near the end of the add-on: Raven, the add-on's final boss, carries the Claw and drops it when he dies. Pick it up after the fight.
But the Claw is worthless at first. You need to consecrate it at a Beliar shrine before it deals any damage. Stand in front of a shrine, open the dialogue, and pick "Improve Claw" - that's the first consecration. From then on, every return to a shrine lets you upgrade the weapon further. (The shrines also offer gold-for-attribute trades, but that's not relevant here.)
But the Claw is worthless at first. You need to consecrate it at a Beliar shrine before it deals any damage. Stand in front of a shrine, open the dialogue, and pick "Improve Claw" - that's the first consecration. From then on, every return to a shrine lets you upgrade the weapon further. (The shrines also offer gold-for-attribute trades, but that's not relevant here.)
No Strength Requirement
The Claw has no minimum strength requirement. Any character can wield it - a low-STR Dragon Hunter, a Mercenary, a Paladin, anyone. This is unusual for a weapon this strong, and it makes the Claw a legitimate end-game option even for Dexterity-focused builds if you also happened to train a melee weapon.
The Upgrade System
The Claw has 20 upgrade stages total. Every 2 character levels you gain unlocks the next stage - but only when you actually pray at a Beliar shrine. If you skip the shrine for a while, the upgrades stack up: pray after 6 character levels and the Claw jumps 3 stages at once.
Each upgrade costs -5 HP permanent. At full max upgrade (stage 20), you've paid a total of -100 HP. That loss is baked into your character for the rest of the game and cannot be reversed.
You reach stage 20 at character level 47. Past that, the weapon can't be improved further.
Each upgrade costs -5 HP permanent. At full max upgrade (stage 20), you've paid a total of -100 HP. That loss is baked into your character for the rest of the game and cannot be reversed.
You reach stage 20 at character level 47. Past that, the weapon can't be improved further.
Skip Shrines, Batch Upgrades
You don't have to run back to a shrine after every 2 levels. Skip a few visits on purpose - when you finally pray, the Claw catches up all at once. Especially useful in chapters where you're far from a shrine and don't want to waste travel time. The end result is identical to upgrading every 2 levels; only the walking is different.
HP Loss Is Permanent
Every 5 HP you sacrifice at the shrine is gone for good. There's no way to restore it - not with potions, not with level-ups, not with the end-of-chapter HP resets. Before you commit to stage 1, decide: do you want the weapon or not? If yes, commit to all 20 stages (100 HP is a lot, but the damage payoff is huge). If no, skip the shrine entirely and consider the Saturas option below.
Full Upgrade Table
Each stage adds +1 weapon damage and +2% extra attack chance. The full progression from stage 1 to stage 20:
- Stage 1 (char level 1-10): 1H 90 dmg / 12%, 2H 100 dmg / 12%
- Stage 2 (char level 11): 1H 91 / 14%, 2H 101 / 14%
- Stage 3 (char level 13): 1H 92 / 16%, 2H 102 / 16%
- Stage 4 (char level 15): 1H 93 / 18%, 2H 103 / 18%
- Stage 5 (char level 17): 1H 94 / 20%, 2H 104 / 20%
- Stage 6 (char level 19): 1H 95 / 22%, 2H 105 / 22%
- Stage 7 (char level 21): 1H 96 / 24%, 2H 106 / 24%
- Stage 8 (char level 23): 1H 97 / 26%, 2H 107 / 26%
- Stage 9 (char level 25): 1H 98 / 28%, 2H 108 / 28%
- Stage 10 (char level 27): 1H 99 / 30%, 2H 109 / 30%
- Stage 11 (char level 29): 1H 100 / 32%, 2H 110 / 32%
- Stage 12 (char level 31): 1H 101 / 34%, 2H 111 / 34%
- Stage 13 (char level 33): 1H 102 / 36%, 2H 112 / 36%
- Stage 14 (char level 35): 1H 103 / 38%, 2H 113 / 38%
- Stage 15 (char level 37): 1H 104 / 40%, 2H 114 / 40%
- Stage 16 (char level 39): 1H 105 / 42%, 2H 115 / 42%
- Stage 17 (char level 41): 1H 106 / 44%, 2H 116 / 44%
- Stage 18 (char level 43): 1H 107 / 46%, 2H 117 / 46%
- Stage 19 (char level 45): 1H 108 / 48%, 2H 118 / 48%
- Stage 20 (char level 47): 1H 110 / 50%, 2H 120 / 50%
Extra attack damage is a flat 100 HP that ignores all armor values. At stage 20 with 50% proc chance, roughly every second hit does an extra 100 unreducible damage on top of the weapon's base damage.
1H or 2H - The Game Decides
You don't pick the Claw's weapon type directly. At each consecration, the game checks which of your melee skills is higher - One-Handed or Two-Handed - and hands you the Claw in that form.
You can switch between upgrades. If you trained the other skill higher since the last consecration, the Claw flips to the new form at the next upgrade. Useful if you decide mid-playthrough to pivot your build.
Lock-in at max stage. Once the Claw reaches stage 20, the type is final. No more switching.
Damage difference: The 2H version has a flat +10 damage advantage at every stage (100/120 vs 90/110). If your build can go either way, 2H is the stronger long-term choice - but only if you're comfortable with the slower attack animations.
Fire Mage Alternative: Beliar Runes
Fire Mages never wield the Claw. The first time a mage prays at a Beliar shrine, the weapon vanishes from the inventory and the shrine hands out a Beliar rune instead. From then on, every shrine visit lets a mage swap one Beliar rune for another.
The mage path has a very different economy: you don't collect runes like with fire and water magic (where you keep every rune you ever forge). You always carry exactly one Beliar rune at a time. Swapping is how you "upgrade" - and swapping up a circle costs HP, same as the warrior upgrades.
The mage path has a very different economy: you don't collect runes like with fire and water magic (where you keep every rune you ever forge). You always carry exactly one Beliar rune at a time. Swapping is how you "upgrade" - and swapping up a circle costs HP, same as the warrior upgrades.
Available Beliar runes by circle:
- Circle 1 - Rooting Weeds
- Circle 2 - Drain Energy
- Circle 3 - Summon Guardian, Beliar's Wrath
- Circle 4 - Summon Swarm, Summon Zombie
- Circle 5 - Scream of the Dead
Higher circles unlock as your mage progresses through the standard Fire Mage circle training. You can only request runes up to the circle you've reached.
Rune Swap HP Cost
Swapping a Beliar rune for a higher circle costs -5 HP permanent per circle you've already upgraded through. So if you're swapping your Circle 2 rune for a Circle 4 rune, that's -5 HP for the Circle 2→3 step and -5 HP for the 3→4 step, total -10 HP. Swapping within the same circle (e.g. Summon Swarm ↔ Summon Zombie in Circle 4) is free. Plan which high-circle rune you actually want before you climb - paying HP twice because you picked the wrong one is a waste.
Don't Want the Claw?
Trade It To Saturas For 2000 XP
If the HP cost doesn't fit your build, or you've already found a weapon you prefer, hand the Claw to Saturas in the Water Mage camp. He takes it gratefully and pays out 2000 XP - no strings, no HP loss. Clean alternative for anyone who'd rather keep their full HP pool intact. Works for all classes, not just mages.